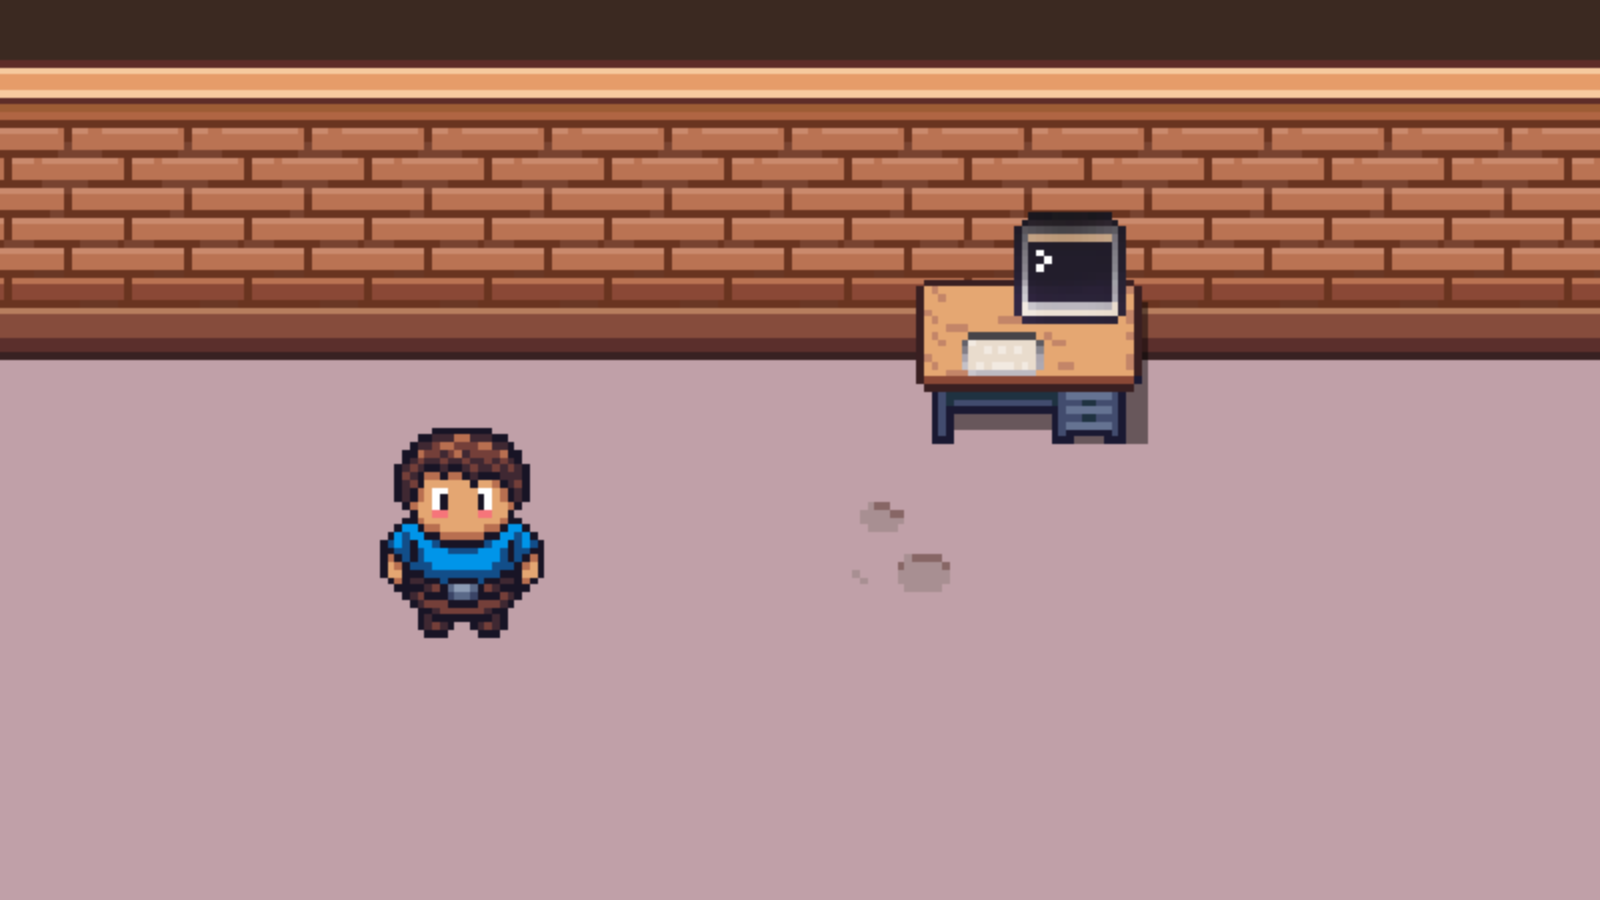
Recently I made some mockups for a potential video game where the player manages some servers in the early days of the internet. The mockups were done by combing assets found on itch.io with Aseprite and exporting animated gifs. The result of this effort is shown in figure 1.
Figure 1 – Mockup
I shared this mockup on reddit and twitter and got some positive feedback. Rather than continuing to test this idea by making mockups with Aseprite, I decided to move from mockup to prototype by creating some scenes with Godot. My main motive for using Godot for future prototypes is that it is much easier to animate complicated scenes with Godot because you can script the behavior of the scene. In Aseprite you are limited to carefully organizing each layer and frame of the scene one after another. This is too tedious for anything more than a few frames.
In this article I will discuss my technique for prototyping the character movement in Godot. As a disclaimer, I am not a Godot expert and this is not intended to be a tutorial. As you read, be aware that there may be a better way to do things.
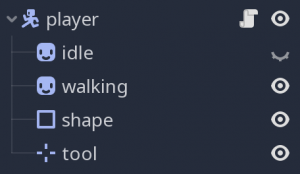
To get started, I created a new scene with an KinematicBody2D node, a Sprite for idle animations, another Sprite for walking animations, and a couple of other nodes that are not used yet. In Godot, Sprite nodes can be hidden. The character’s idle sprite starts out hidden and the walking sprite is shown.
I also updated the projects settings to map the w, a, s, and d keys to player_up, player_left, player_right, and player_down. Creating a named keymap rather than binding to specific keys in a script will allow me to support other input devices in the future.
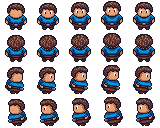
Figure 3 – Idle
As you might have guessed based on the fact that there are two sprite nodes, there are two sprite sheets for this character (figure 3 and figure 4). Both sprite sheets cover four directions, but the idle sprite sheet has more columns per row. In Godot the rows and columns are called hframes and vframes. The frames are counted by starting with the top left frame and going right, starting with zero. In figure 3, the top left frame is 0 and the bottom right frame is 19.

Figure 4 – Walking
The character in the idle sprite blinks and bobs when animated and the character in the walking sprite moves its arms and legs. Both animations go from left to right.
In the process of working on this prototype I attempted to animate the sprite manually. Later on I also animated the sprite via an AnimationPlayer. I will discuss the implementation of both of these methods as well as their pro’s and cons.
Manually Animating a Sprite
To get things started, I attached as script to the character’s KinematicBody2D node and added some variables that will be used to control the animation. I declared a setter for each of these variables. Setters via setget can be very useful for encapsulating logic specific to that variable. They might not be needed at first, but I find it is useful to start that way rather than add them later and potentially detangle a mess where I have littered setter logic all over my script. I also declared a couple of signals to communicate when the character is walking or idle.
extends KinematicBody2D

var idle_timeout = 100 setget set_idle_timeout
var idle_cycles = 5 setget set_idle_cycles
var walking_timeout = 0 setget set_walking_timeout
var player_direction = "down" setget set_player_direction

signal walking
signal idle

func set_idle_timeout(new_value):
    idle_timeout = new_value
    pass

func set_idle_cycles(new_value):
    idle_cycles = new_value
    pass

func set_walking_timeout(new_value):
    walking_timeout = new_value
    pass

func set_player_direction(new_direction):
    player_direction = new_direction
    pass
In order to use the signals I declared, I connected them to the current node in the _ready() function. Later I declare a function called _on_walking() and _on_idle() to handle these signals when they are fired.
func _ready():
    set_process(true)
    self.connect("walking", self, "_on_walking")
    self.connect("idle", self, "_on_idle")
    start_frames.walking = init_start_frames($walking.vframes, $walking.hframes)
    start_frames.idle = init_start_frames($idle.vframes, $idle.hframes)
    pass
The next step is to handle the values that need to be updated during the processing step. _physics_process() will be used to manage a couple of timers and emit signals when the player provides input or becomes idle. It will also control the movement of the character via the velocity of the node. Initial I tried to process the movement of the character by setting its position. Although this will work, it will fall apart as soon as you want the character to collide with things in the game like walls.
func _physics_process(delta):
    var velocity_x = 0
    var velocity_y = 0
    var speed = 0
    if walking_timeout > 0:
        walking_timeout -= 1
    if idle_timeout > 0:
        idle_timeout -= 1
    else:
        emit_signal("idle")
    if Input.is_action_pressed("player_left"):
        velocity_x = -1
        speed = 100
        emit_signal("walking", "left")
    if Input.is_action_pressed("player_right"):
        velocity_x = 1
        speed = 100
        emit_signal("walking", "right")
    if Input.is_action_pressed("player_up"):
        velocity_y = -1
        speed = 100
        emit_signal("walking", "up")
    if Input.is_action_pressed("player_down"):
        velocity_y = 1
        speed = 100
        emit_signal("walking", "down")
    move_and_slide(Vector2(velocity_x * speed, velocity_y * speed), Vector2(0, 1))
    pass
Initially I tried to animate the character using a loop to iterate through each frame, calling yield with a timer at the end of each iteration to make the animation look natural. Initially this seemed to work fine, especially when I was only working on the idle animation. However, I quickly discovered that this technique does not work for a character that is moving across the screen because running the complete animation to it’s finish will make the character appear to be walking in the wrong direction until the animation loop has finished. Instead, I advance the animation on each signal and use some logic to figure out which frame the animation should be on based on the current frame and the direction that the character is facing.
func _on_walking(new_direction):
    var start_frame
    $idle.hide()
    $walking.show()

    player_direction = new_direction

    position = get_next_position(new_direction, walking_speed, position)

    if walking_timeout > 0: return

    start_frame = start_frames.walking[new_direction]
    $walking.frame = get_next_frame($walking.frame, start_frame, $walking.hframes)
    walking_timeout = 5
    idle_timeout = 100

    if $walking.frame != start_frame:
        idle_timeout = 5
    pass
In _on_walking() you can see that I am calling get_next_position() to determine what position on the screen the character should move based on the new_direction from the player’s input. I am also using get_next_frame() to set the frame of the walking sprite to the correct position. This function relies on the result of get_start_frame() which figures out the starting frame for a given sprite sheet based on the direction of the character and the number of hframes and vframes in the sprite sheet. I’ll discuss these functions in detail later. Each time the "walking" signal is emitted I am checking to see if the walking_timeout is greater than 0. The purpose of this is to control how quickly the character is animated. The greater the value of walking_timeout the slower the character will be animated. I check this timeout after moving the character so that the movement of the character across the screen still looks smooth. In order to ensure that the transition from walking to idle is also smooth, I reduce the idle_timeout if the current frame is not the starting frame. that way the character doesn’t stop with one foot forward like it it is mid-step when there is no additional player input.
func _on_idle():
    var start_frame
    $walking.hide()
    $idle.show()

    if idle_timeout > 0: return

    start_frame = start_frames.idle[player_direction]
    $idle.frame = get_next_frame($idle.frame, start_frame, $idle.hframes)
    idle_timeout = 5
    idle_cycles += 1

    if idle_cycles > 5 and $idle.frame >= start_frame + $idle.hframes - 1:
        idle_timeout = 100
        idle_cycles = 0
    pass
_on_idle() is similar to _on_walking() and also uses get_next_frame() to animate the character. The idle animation also uses a timer to control the speed of the animation. In addition, the number of idle_cycles that occurs is tracked and a longer timer is set when enough cycles have elapsed. This allows the animation to have a longer pause between animation loops so that it looks more natural.
func get_next_frame(frame, start, boundary):
    if frame < start + boundary:
        frame += 1
    if frame >= start + boundary or frame < start:
        frame = start
    return frame
    pass
get_next_frame() calculates what the next frame should be based on the current frame, the starting frame of the animation, and the boundary. If the value of the current frame is less than the boundary, the frame is incremented. Otherwise, the frame is set back to the starting frame.
func get_start_frame(direction, vframes, hframes):
    var frame
    match direction:
        "left":
            frame = vframes * hframes - hframes
        "right":
            frame = vframes * hframes - hframes * 2
        "up":
            frame = vframes * hframes - hframes * 3
        "down":
            frame = vframes * hframes - hframes * 4
    return frame
    pass
The last function for animating the character is get_start_frame(). The function calculates what the starting direction should be for a given 4 direction sprite sheet with any number of horizontal frames. I initially used a dict containing the hardcoded values for the idle and walking start frames. However, using a dict in this way means that I will need to update the values for each start frame every time I wanted to add something new. On the other hand processing get_start_frame() on every input signal isn’t a very efficient use of cpu. I opted for something in the middle that allows the start frames to be pre-computed into a dict on _ready().
func init_start_frames(vframes, hframes):
    var directions = ["left", "right", "up", "down"]
    var frames = {}
    for i in directions.size():
        frames[directions[i]] = get_start_frame(directions[i], vframes, hframes)
    return frames
    pass
The init_start_frame() function initializes a dict of start frames for a 4 direction animation with any number of hframes. If this scene is used as the base for an inherited scene in the future, the inherited scene can init_start_frame() for any additional sprite sheets and assign them to start_frames.
The snippets of code above are all that is necessary to move and animate the character on the screen. The complete code can be viewed in this gist. Keep in mind that the other files for the scene are not included so you will need to adapt this code to your own scene.
Animating a Sprite with an AnimationFrame
 After sharing this article on reddit, u/PleasantAdvertising asked why I did not use an
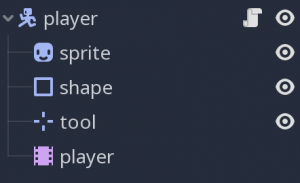
 AnimatedSprite. Truthfully I was unaware of the existence of that Godot feature. However, I decided to give it a shot anyway to compare the results. I quickly discovered that AnimatedSprite will not have good sprite sheet support until Godot 3.2. In order to use this feature I would need to splice each individual frame into its own image. After some research I found that AnimationPlayer does support sprite sheets and you can create animations from region or animation frame. The node hierarchy for this version of the scene is shown in figure 5.
extends KinematicBody2D

var idle_timeout = 100 setget set_idle_timeout
var player_direction = "down" setget set_player_direction
var player_action = "" setget set_player_action

func set_idle_timeout(new_value):
    idle_timeout = new_value
    pass

func set_player_direction(new_direction):
    player_direction = new_direction
    pass

func set_player_action(new_action):
    player_action = new_action
    pass

func _ready():
    set_process(true)
    pass
All said, I was able to cut out around 50 lines of code using AnimationPlayer instead of animating my character’s sprite manually. Now only need to track the timeout interval for the idle animation, the direction the player is facing, and the last action of the player.
func _physics_process(delta):
    var velocity_x = 0
    var velocity_y = 0
    var speed = 0
    if idle_timeout > 0:
        idle_timeout -= 1
    else:
        _on_idle()
    if Input.is_action_pressed("player_left"):
        velocity_x = -1
        speed = 100
        _on_walking("left")
    if Input.is_action_pressed("player_right"):
        velocity_x = 1
        speed = 100
        _on_walking("right")
    if Input.is_action_pressed("player_up"):
        velocity_y = -1
        speed = 100
        _on_walking("up")
    if Input.is_action_pressed("player_down"):
        velocity_y = 1
        speed = 100
        _on_walking("down")
    move_and_slide(Vector2(velocity_x * speed, velocity_y * speed), Vector2(0, 1))
    pass
In physics_process() I made a slight change where I call the functions I was using to handle signals directly. However, continuing to use a signal would have also worked.
func _input(event):
    if (event.is_action_released("player_down")
    or event.is_action_released("player_up")
    or event.is_action_released("player_left")
    or event.is_action_released("player_right")):
        player_action = ""
        $player.stop()
    pass
I did have to add an event handle for the directional inputs being released, otherwise the animation transitions would not have felt responsive to the player’s directional input. This function checks to see if any of the directional keys were released as opposed to the manual animation example where the animation only plays if a directional key is pressed. In addition, I had to track the last input action player_action and clear it when keys were released to avoid a problem where pressing two keys at the same time would cause the AnimationPlayer to freeze when it was called by two key inputs.
func _on_walking(new_direction):
    var fmt_string = "walking-%s"
    var animation = fmt_string % new_direction
    if player_action and player_action != new_direction: return
    player_action = new_direction
    player_direction = new_direction
    $player.play(animation)
    idle_timeout = 5
    pass

func _on_idle():
    var fmt_string = "idle-%s"
    var animation = fmt_string % player_direction
    if idle_timeout > 0: return
    $player.play(animation)
    pass
The last bits are the handlers to play the animations based on whether or not the player is moving or idle. I’m doing some sting formatting to called the correct animation. That’s all that is required in terms of code to accomplish my goal of animating the character based on the player’s input. You can view this gist to see the complete script.
At a high level, the AnimationPlayer seems like less effort that manually animating the sprite. In general I feel like it is the better solution because it seems to be how the game engine is intended to be used. On the other hand, the AnimationPlayer comes with some significant downsides. In the example of manual animation via processing my solution could handle a sprite sheet with variable dimensions. An AnimationPlayer is only slightly better than an AnimatedSprite in terms of setup work involved. Each direction must be configured by hand in the editor.
To me, the user experience for this workflow is as tedious as eating rice with toothpicks for chopsticks. In the processes of setting up the animations I experiences shock, disbelief, and anger both individually and simultaneously. It is the pitfall of “low code/code generation” solutions. It railroads the user into an extremely repetitious task via the editor. It also makes assumptions about the user’s intent. For example, in a futile effort to work around the repetitive task I created my own .tres files by hand to set up the animations rather than work with the user-interface one mouse click at a time only to discover that the editor can and will overwrite the contents of these files because it assumes only the editor will change them. I should have known better.
In the end, I created the animations by hand with the editor, but I found the process to be extremely tedious. I am torn about which is a better solution. I feel that needing to create each new animation by hand is far too difficult through the editor’s UI. I would like to work on a good code only solution for setting up and controlling animation players.
In the video below, you can see the result of the two approaches to animating the character’s sprite. On the left is the AnimationPlayer. On the right is my solution for manually animating the sprite. I placed them on the same
The end result can be seen in the video above. The character moves around the screen depending on which key is pressed. When the character is not moving the idle animation plays intermittently.
The original artwork used to create this prototype is linked below. Thank you to each of the artists for sharing their work on itch.io.